HTTPS (Hyper Text Transfer Protocol Secure) is the secure version of HTTP which allowing all communications between your browser and the website are encrypted. HTTPS offers an extra layer of security because it uses SSL to transfer data. Web browsers such as Internet Explorer, Edge and Chrome will display a padlock icon in the address bar to visually indicate that a HTTPS connection is in effect.
However, the process of acquiring an TLS/SSL certification and enable HTTPS protocol has never been easy. You have to pay extra money for a certificates every year and deal with a lot of detail settings. Let’s Encrypt, a new certificate authority, provide a simple and free process of manual certificate creation, validation, singing, installation and renewal. However, the free Let’s Encrypt certificate will be expired in 3 months, which means you need a process to periodically renew the certificate if you choose it. In this blog, I would like to document how I apply HTTPS on my Azure Web App with Let’s Encrypt and enable auto certificate renewal.
The Story
Add support for free SSL certs like those from Let’s Encrypt is a high votes feature on Azure Web App for a long time. It is resolved by community that Simon published a Azure Site extension, Azure Let’s Encrypt, for easy install and renewal of Let’s Encrypt SSL certificates.
Prerequisites
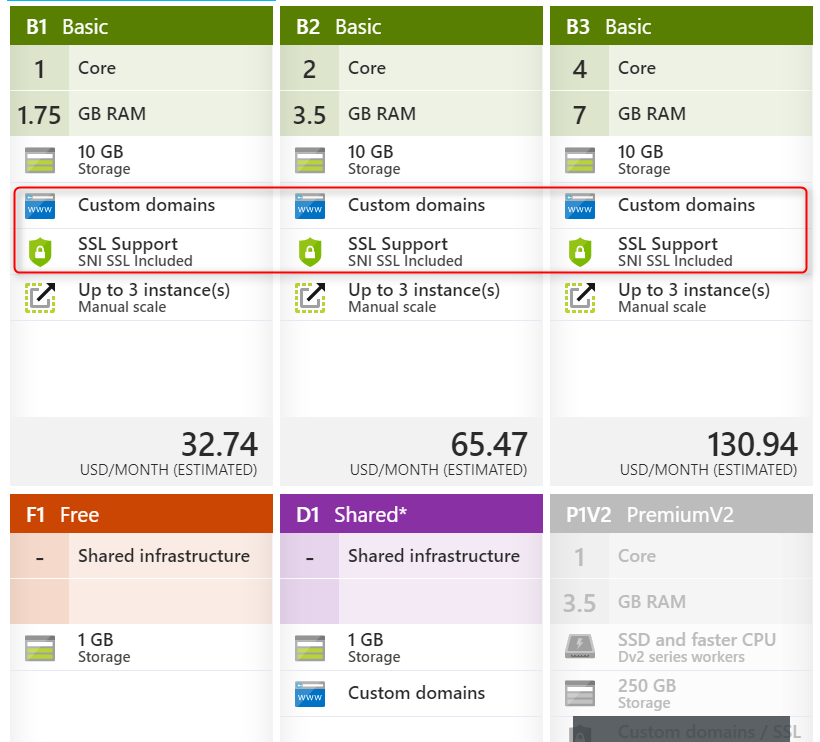
- Make sure that your App Service Plan allows SNI (Server Name Indication) and Custom Domains / SSL
- A custom domain name.
Setup
Configure Azure Web Jobs Connection string
Azure Let’s Encrypt extension requires a web job to renew the certificate once it is expired after 3 months. Therefore, you need to add the two Connection Strings AzureWebJobsDashboard and AzureWebJobsStorage to your Azure Web App to host the web job.
Both of these should be set to an Azure Storage Account connection string, e.g. DefaultEndpointsProtocol=https;AccountName=[myaccount];AccountKey=[mykey]; Be sure that the connection string doesn’t end with EndpointSuffix=core.windows.net as the extension will not work then.
Configure Service Principal for Azure Let’s Encrypt extension
Service Principal is Azure AD concept which just like a service account that allow specific application to access your Azure resources. The extension need a service principal to get the permission to access the resources to renew and install the certificate.
Create a Service Principal though the portal
Login to Azure Portal
Navigate to Azure Active Directory -> App Registrations, click New application registration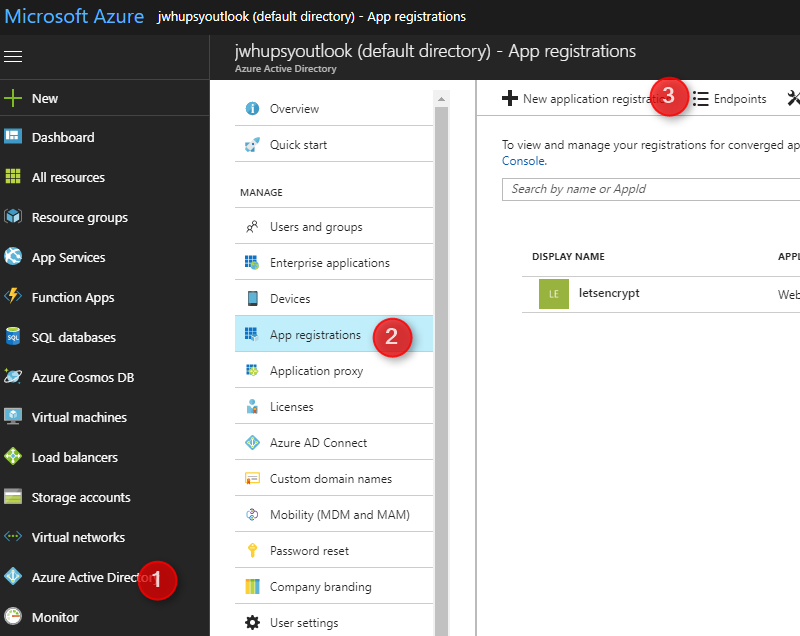
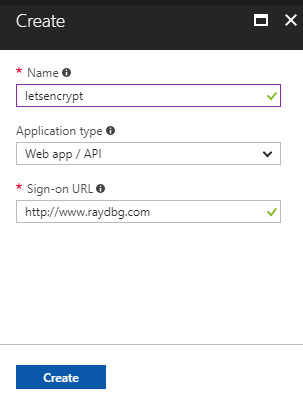
Fill in name of the application and select WEB APP/API and click the next button. For SIGN-ON URL, provide the URI to a web-site that describes your application. The existence of the website is not validated. You can use the url to the web app you want SSL on.
Click Create
Get the Application ID and create a secret
The service principal is uniquely identified by its Application ID. To get that, select the newly created application.
You should see the Application ID in details page. Then click on Keys in settings page.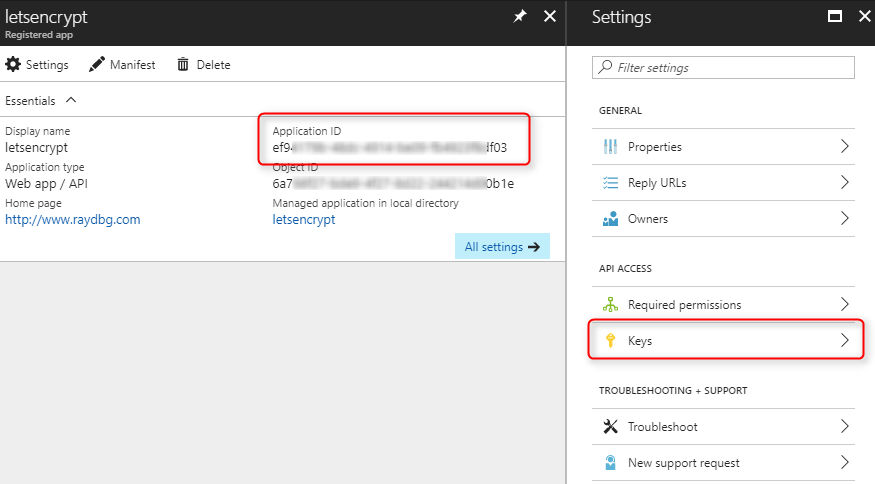
Create a new Password (secret key). Copy the key value.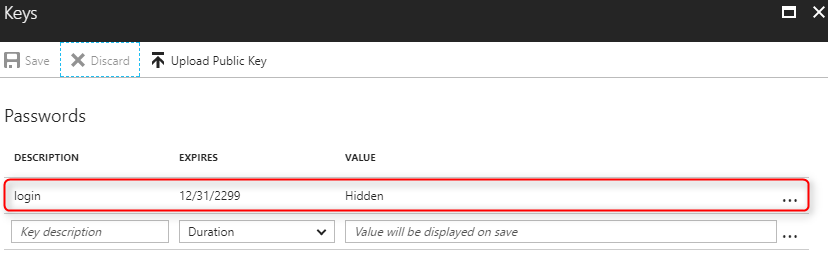
So now you should have
Application IDSecret Key
Grant permission to the Service Principal
Navigate to your resource group for you App Service and App Service Plan
Click the Access control(IAM) -> Add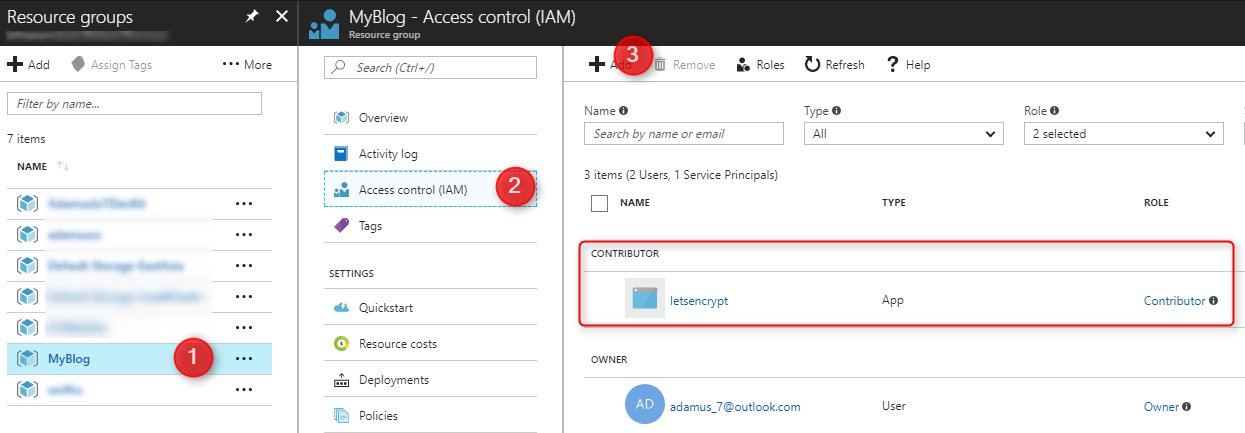
Add Contributor role to your Service Principal
Setup Let’s Encrypt
Now let’s install and configure Let’s Encrypt extension and
Install Let’s Encrypt extension
Open your site’s SCM page (https://{your site name}.scm.azurewebsites.net).
In Site extension page, search Azure Let’s Encrypt. Click + to install it for your application.
Once the site extension has finished installing, you’ll be required to restart the site. After the restart, click the triangle Launch button that replaced the extension’s install button.
Configure Azure Let’s Encrypt
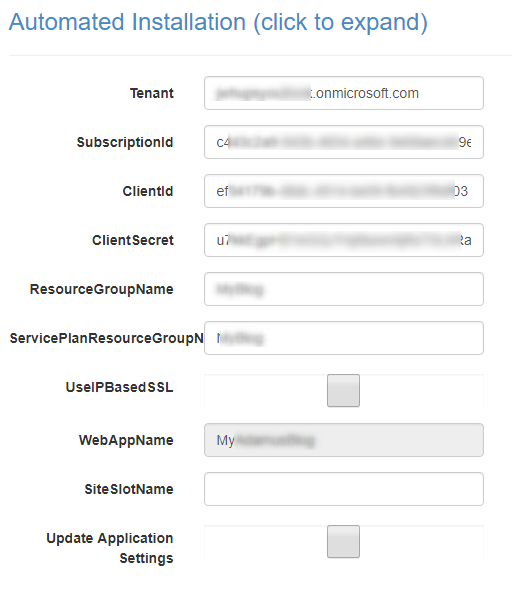
The first page of the site contains the following fields that must be provided by you. You can either fill them out from the site extension or you can set the properties as app settings.
Tenant- is the tenant name of the Azure AD that the service principal was created in, e.g. yourdomain.onmicrosoft.com
SubscriptionId- is the subscription id that the resource groups belongs to. You get the ID from https://portal.azure.com/#blade/Microsoft_Azure_Billing/SubscriptionsBlade
ClientId- is the client id of the application/service principal you created
ClientSecret- is the password/key you created for the service principal
ResourceGroupName- is the name of the resource group that the App Service is located in
ServicePlanResourceGroupName- is the name of the resource group that the App Service Plan is located in, e.i. if you are hosting everything in the same resource group ServicePlanResourceGroupName should equal ResourceGroupName
Update Application Settings- set this to true to save the setting as web application settings, this is required if you didn’t already add the settings as web app settings, so the values are available for the renew certificate web job later.
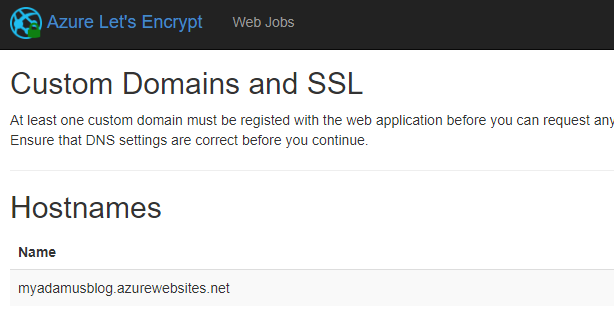
Verify Hostnames
Before you can request a Let’s Encrypt certificate for the web app, you need to register a custom domain name for you application Once a domain name is registered you should see something similar to this:
Request and Install certificate
Click Next on previous page to proceed the process to request the certificate.
Select which hostname you want to request certificates for and provide your email address.
Click Request and install certificates.
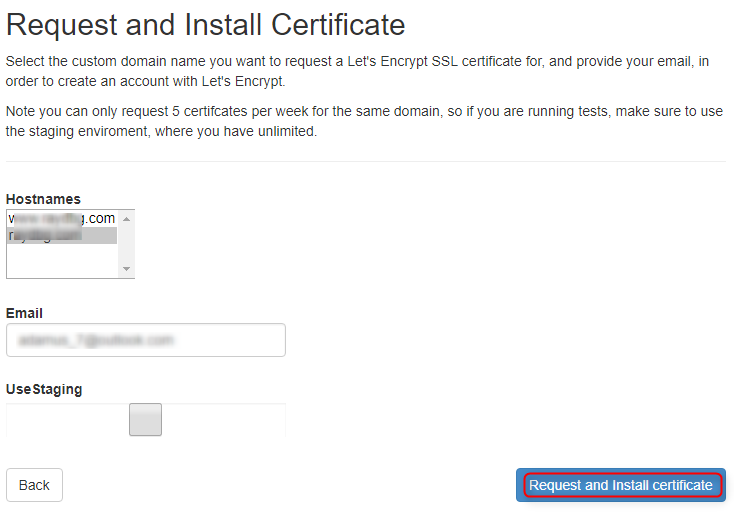
Wait a few seconds, the certificate will get requested and assigned to your domain.
Done!
Now, let’s access our website using HTTPS protocol, you should able to see it is marked as secure by browsers. More importantly, the certificate will be auto renewed when is expired!


One more step
Wait! Don’t forget to redirect HTTP request to HTTPS!
You can do it in many ways. I just added a redirect rule in web.config as below
1
2
3
4
5
6
7
8
9
10
11
12
13
14
15<configuration xmlns="http://schemas.microsoft.com/.NetConfiguration/v2.0">
<system.webServer>
<rewrite>
<rules>
<rule name="HTTP to HTTPS redirect" stopProcessing="true">
<match url="(.*)" />
<conditions>
<add input="{HTTPS}" pattern="off" ignoreCase="true" />
</conditions>
<action type="Redirect" redirectType="Found" url="https://{HTTP_HOST}/{R:1}" />
</rule>
</rules>
</rewrite>
</system.webServer>
</configuration>
Reference: