You probably often use web API provide by Azure/Microsoft in your web applications for customized requirements. Normally, you should follow OAuth 2.0 code authorization flow to acquire the access token for the API in your web application. But in Logic Apps, the story is different because all the actions of a work flow are executed in backend.
In this blog, we will discuss how to consume Azure API in Logic Apps. In our experiment, we will use CRM WebAPI as an example.
Part 1: Register an application in Azure AD.
- Login to Azure Classic Portal https://manage.windowsazure.com/
- Open Active Directory.

- Click on Add button.
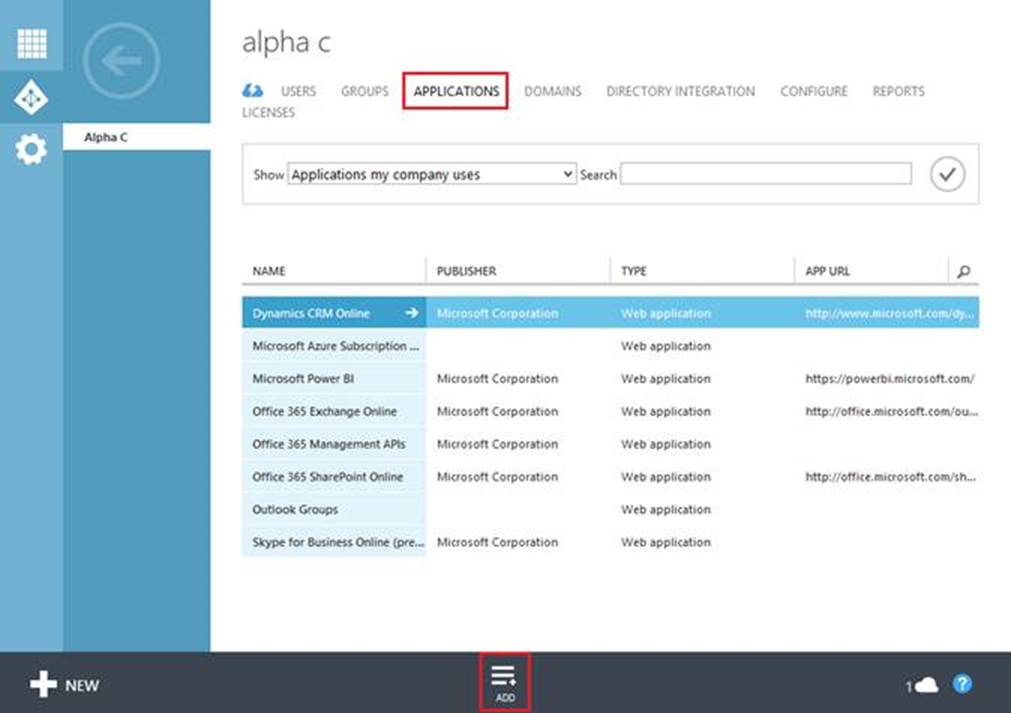
- Select “Add an application my organization is developing” on the popup dialog.
- Set the new application properties to:
a. Name: CRM OAuth2 Demo (you can use what name you want)
b. Type: Web application and/or web API - Click Next button.

- Set the following application properties: (Any urls we can set here I think because we can change them later, just make sure the validations can be passed.)
a. Sign-On URL: http://localhost:1234
b. APP ID URL: https://alphac25.onmicrosoft.com/crmoauth2demo
Click Complete button.
- The new application titled CRM OAuth2 Demo will be added to the list of applications in the selected Azure Active Directory.
- Select the new application titled CRM OAuth2 Demo.
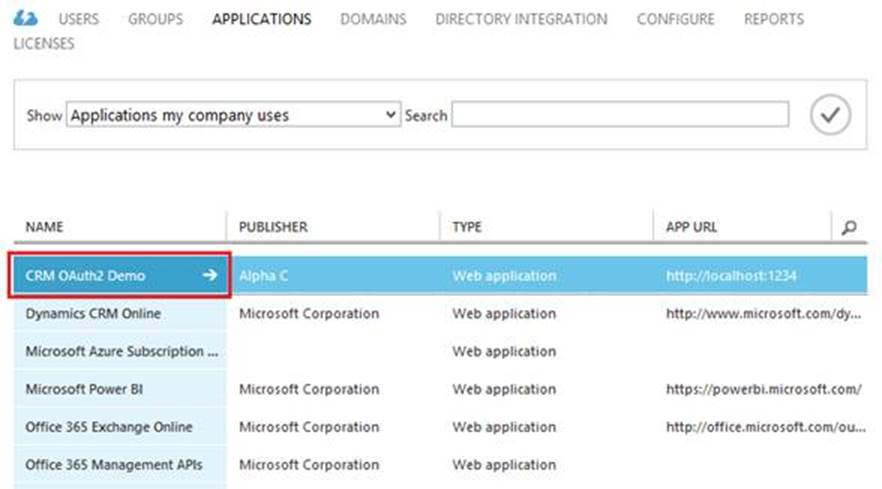
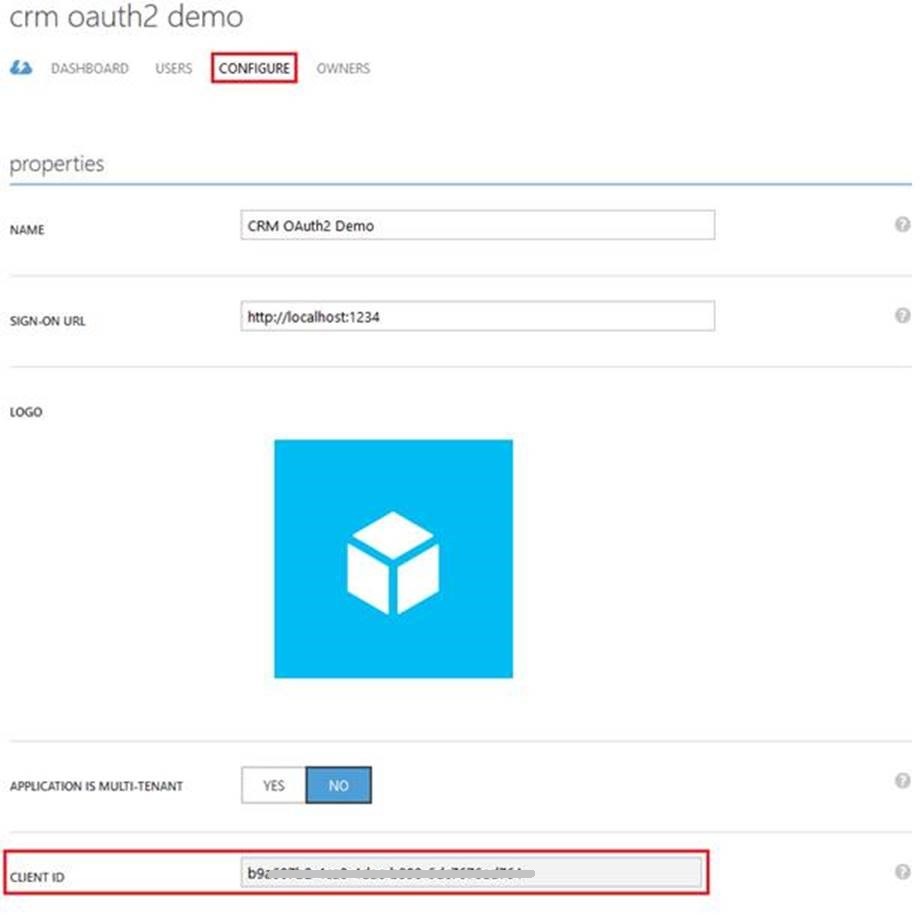
- The Application Configuration Tab is displayed with the Client Id.
- Configure a client secret for the application.
To generate an access token, we need to configure a client secret. To do this we add a key to the application in Azure AD. Below is a step by step guide to do this.
a. Following on from the previous section, scroll down to the keys on the applications configuration screen
b. Create a new key by selecting 2 years in the Select Duration drop down list.
c. Click Save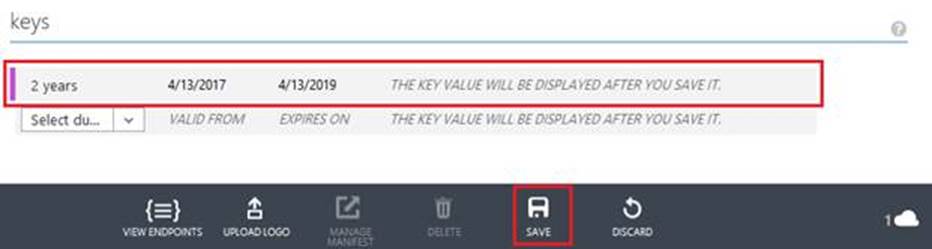
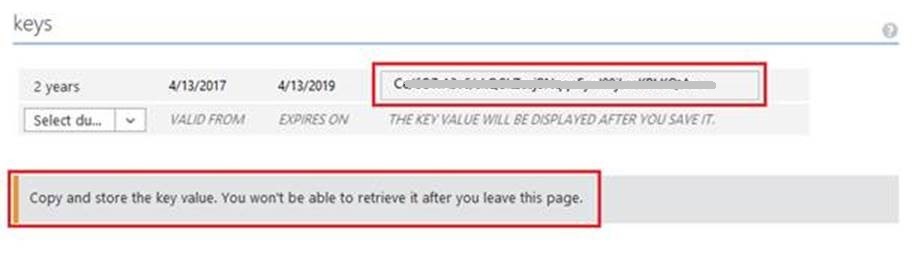
- Store the generated key (Client Secret) in a safe place because it will not be visible the next time the keys screen is displayed.
- Assign Dynamics CRM permissions to the Demo application.
a. Continuing from the previous section, on the applications configuration scroll down to the permissions to other applications section.
b. Click on the Add application button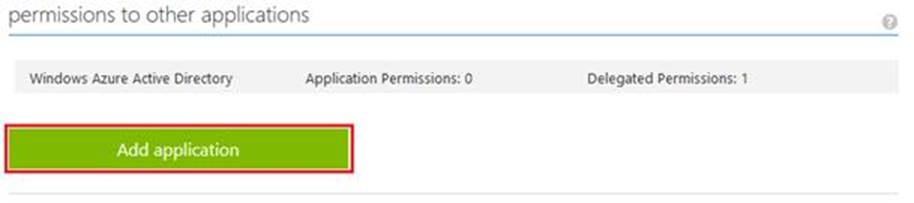 c. The permissions to other applications dialog is displayed.
d. Select Dynamics CRM Online.
e. Click the Add button.
f. Click the Complete button (tick in the lower right corner of the dialog).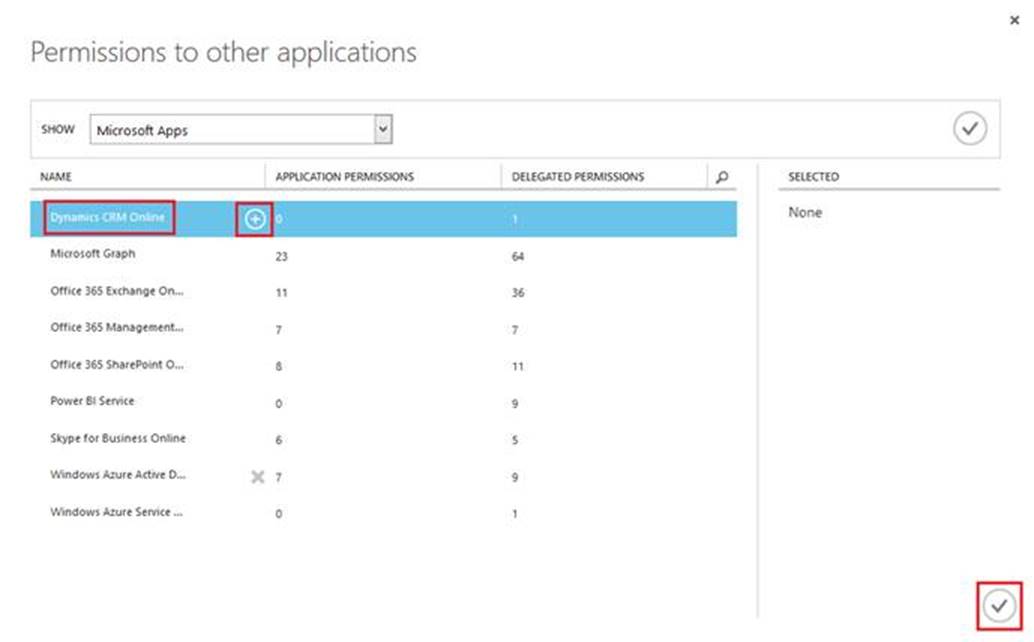 g. Dynamics CRM Online is added to the permissions to other applications list
h. Check the Access CRM Online as organization user permission from the Delegated Permissions drop down list.
i. Click save.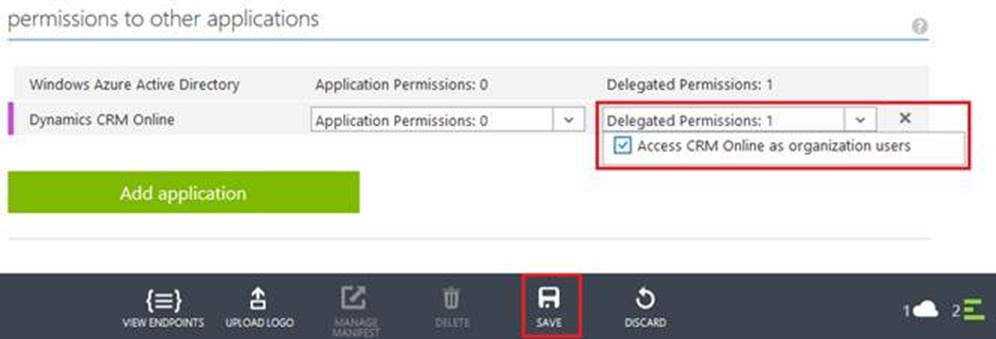
Part 2: Acquire an access token and use it to call CRM WebAPI
Add an action to acquire access token
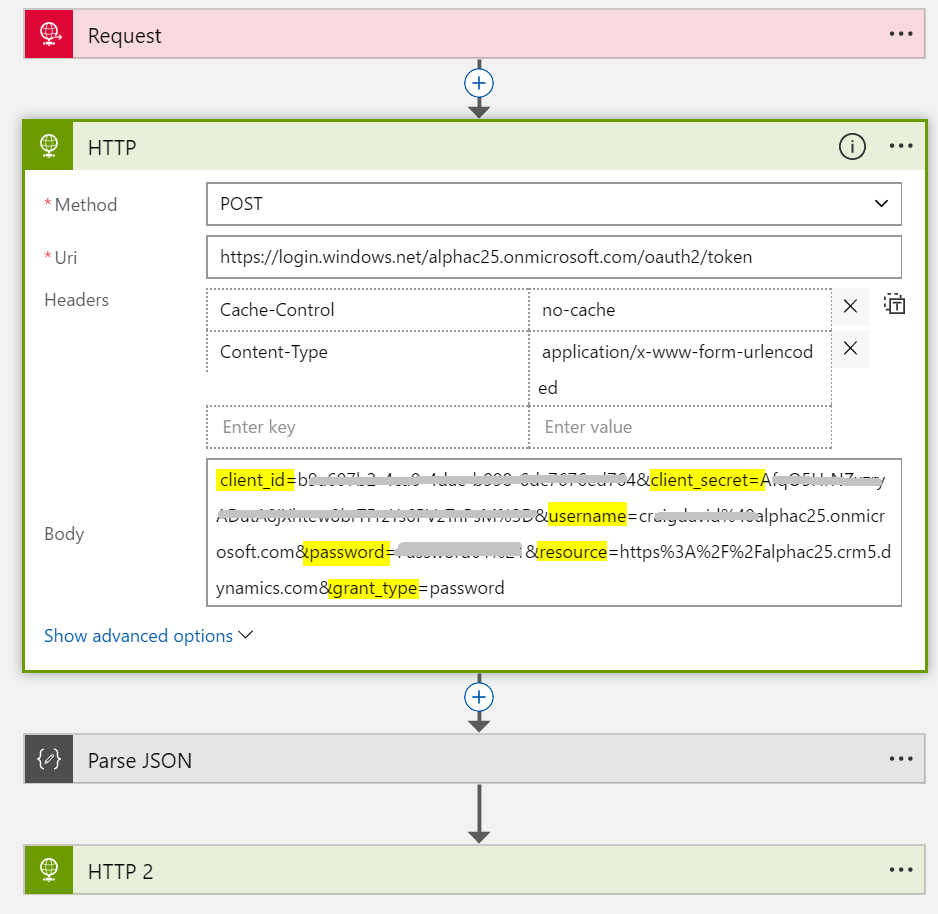
Set Headers:
1
2
3
4
5
6
7
8
9
Cache-Control: no-cache
Content-Type: application/x-www-form-urlencoded
Set Body:
client_id: Client ID from Azure AD
client_secret: Client ID from Azure AD
username: username of the crm user
password: crm user's password
resource: crm url eg: https://alphac25.crm5.dynamics.com
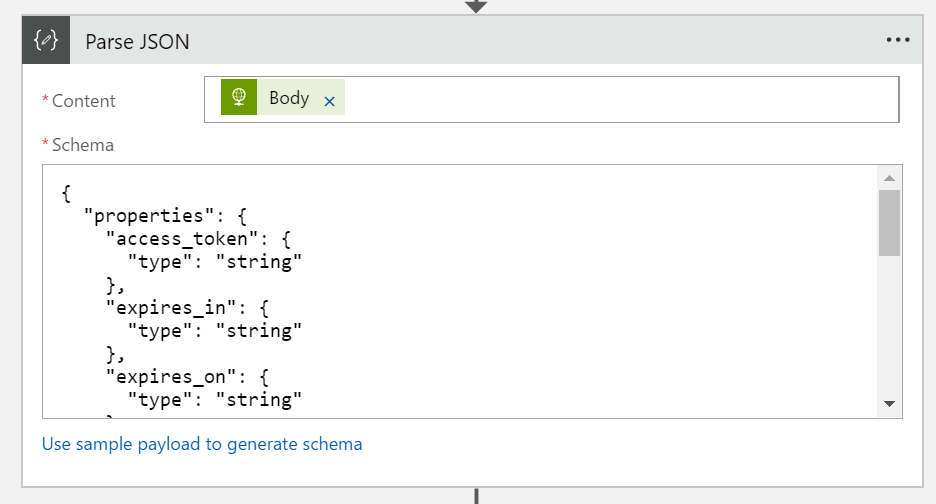
grant_type: passwordAdd an action to Parse the HTTP response.
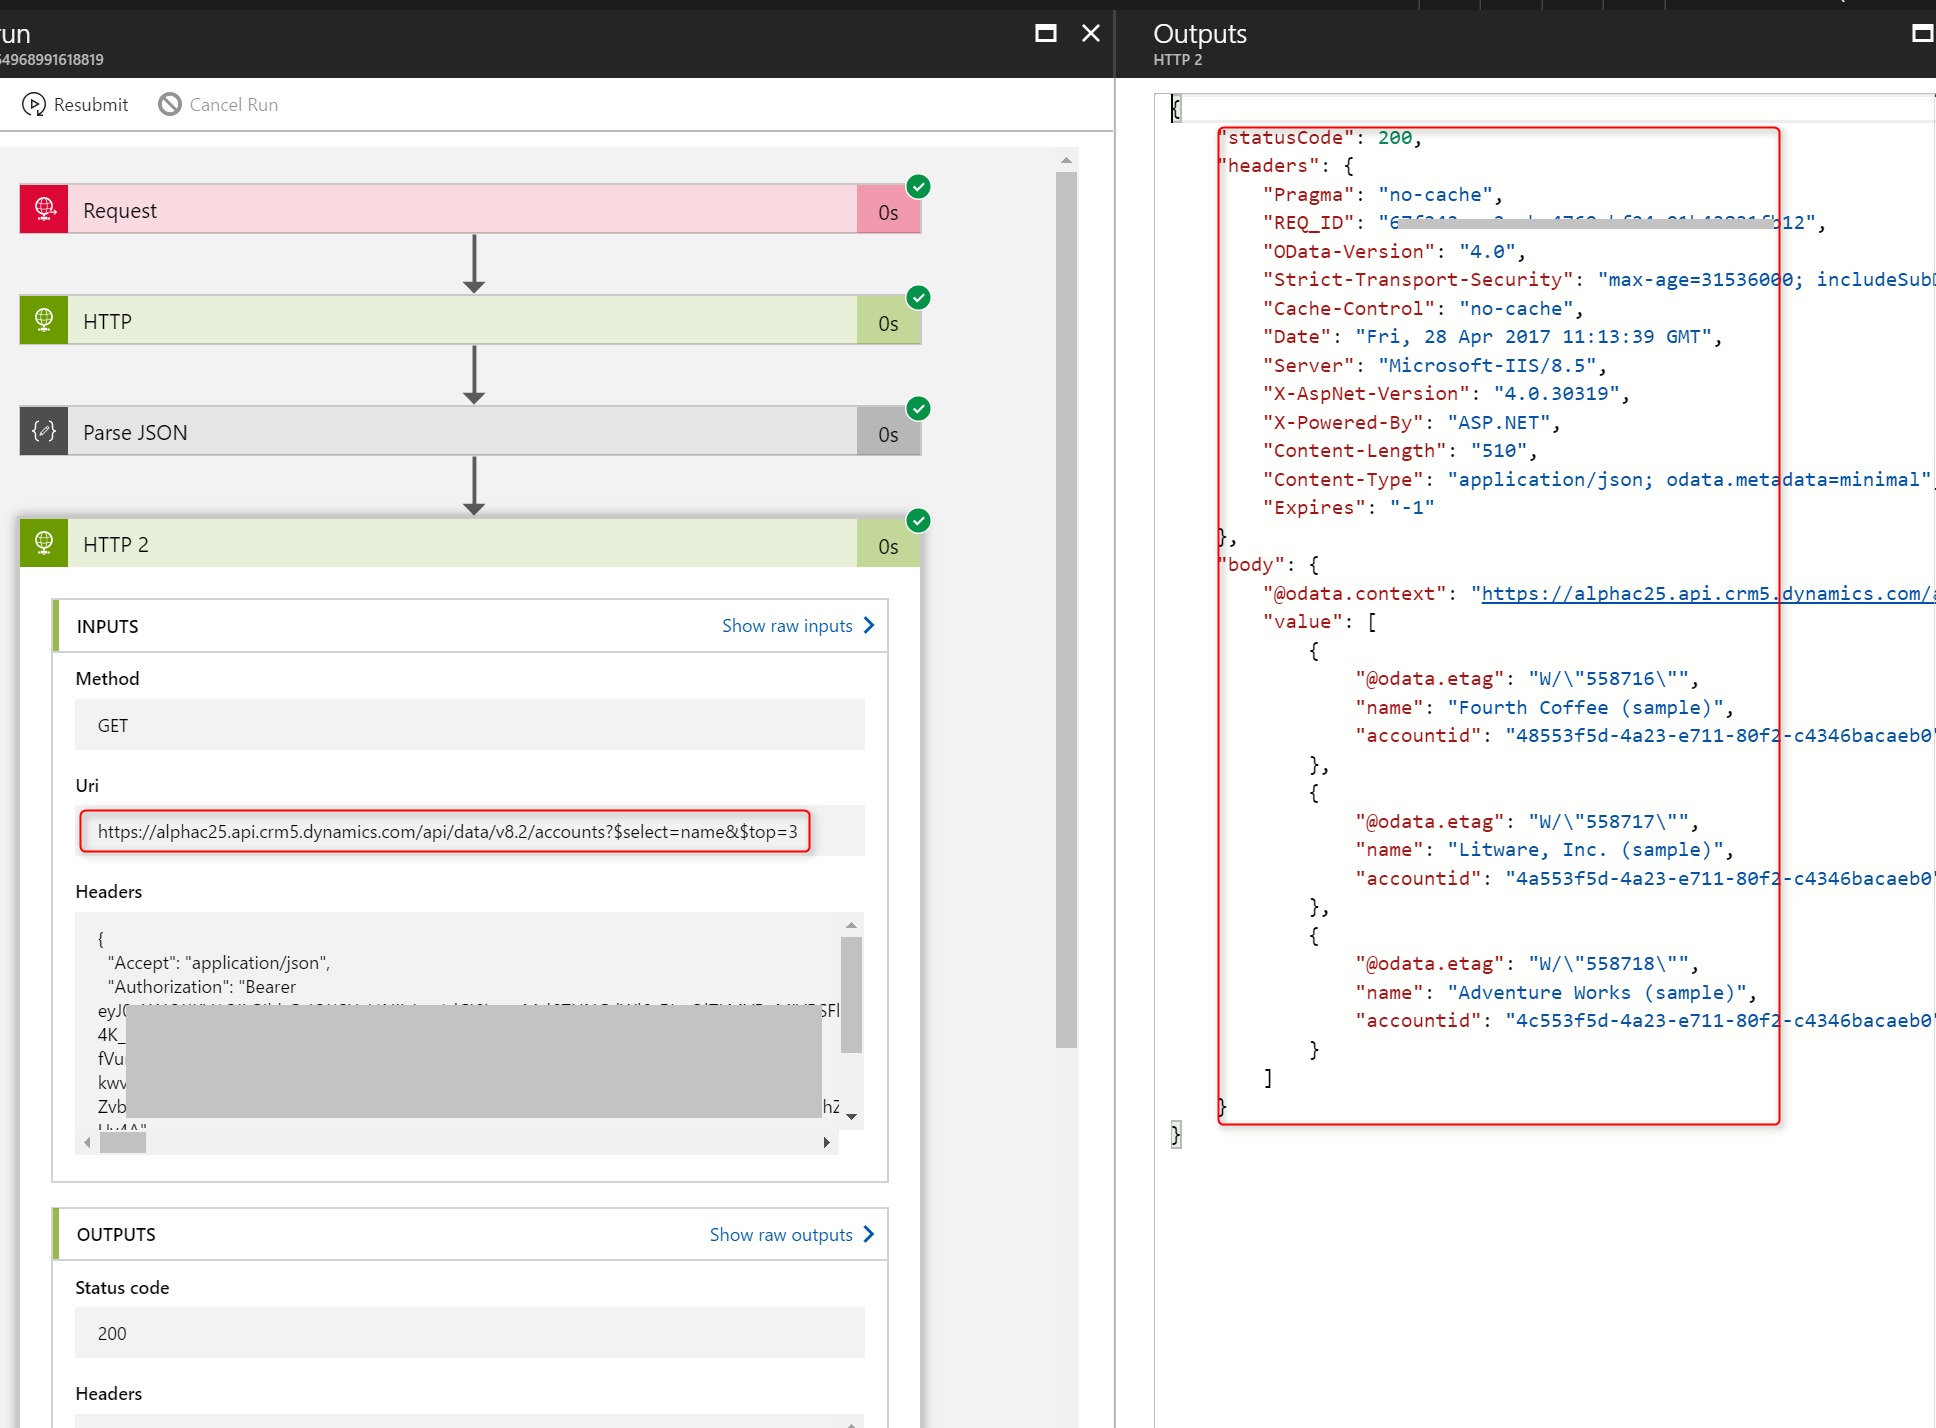
- Add another HTTP action to call CRM WebAPI:
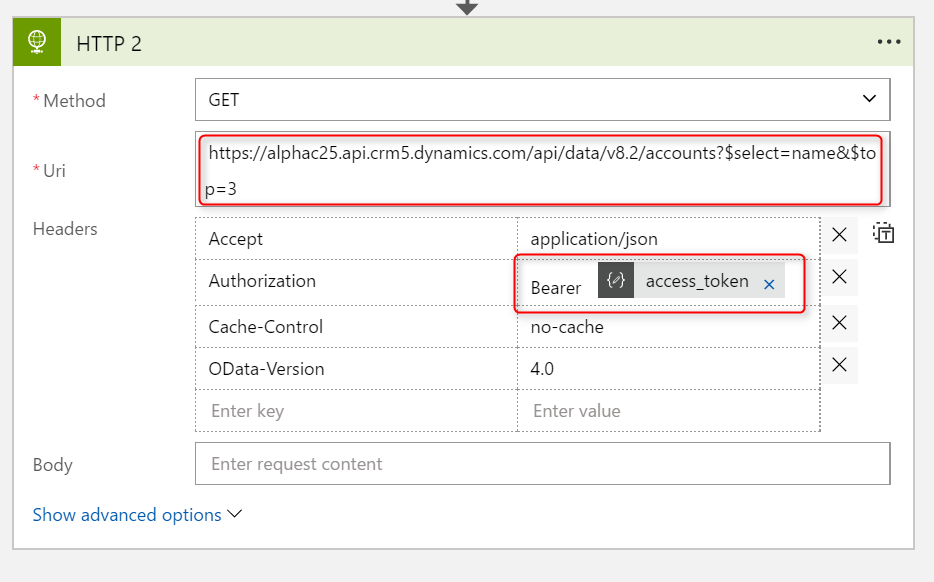
1
2
3
4
Authorization: Bearer <access_token>
Accept: application/json
OData-Version: 4.0
Cache-Control: no-cache
Test result: